Showing posts with label christmas. Show all posts

Monday, May 19, 2014

Christmas Studio J and Picure My Life cards

Keeping in the same thread of "scrapping out of season", I thought I'd share some more holiday Studio J/PML sets. From Millan.Net

I made this Christmas layout a couple of years ago using the Believe paper pack...


And just last month created a coordinating PML page...


Quick and easy...that's why I love Studio J!

Wednesday, November 20, 2013

Noel

This was a simple and quick card to put together.  Totally not my usual style, but it was fun to do.  I used the Cricut Craft Room to design the landscape using the House (pg. 42), the Tree2 (pg. 52), and the Rectangle8 (pg. 65) from the Art Philosophy cartridge.  I welded the Noel (pg. 79) from the Artiste cartridge in the bottom corner.

Paper: Sparkle and Shine Reflections Kit (limited time only!!)
Tools: Art Philosophy, Artiste Cricut cartridge

When I cut the pieces, I cut two of the snow scene.  I tore the top off of one and attached it to the top of the other to create some depth in the snow.  If I make this again, I think I'll cut another snow scene piece for more depth.  Or I may just leave it and move on to another card design in my head.

Come back soon and see!

Tuesday, November 19, 2013

Christmas Card Binder

This past Stamp Camp, my friend Trish shared her project and I loved it!  She solved the problem of what to do with all those Christmas cards and photo cards you receive every year.  Create a binder for them!

She used the new My Creations Kraft Album and created a beautiful project you can keep those photos and cards safe, and bring some holiday cheer into your home at the same time!

Stamps: Framework Alphabet
Inks: Ruby
Papers: Frosted Reflections kit, Kraft cardstock
Accessories: Ruby Shimmer Tape, Ruby Mini-Medley Assortment, Sparkles
Tools: Art Philosophy Cricut cartridge


I'll be using the Artbooking cartridge to add some Kraft cardstock pages to my binder.  Because I love it so much and thing it is such a fantastic project, I'm offering classes at my home next month.  Emails have been sent out, but if you're not on my class list and would like to attend, give me shout and I'll get you set up!

Now, I just have to wait for the post to be delivered!  From Millan.Net


Wednesday, November 13, 2013

Happy Holidays

I forgot to post the last card for my workshop!  From Millan.NetAnd it is one of my favorites!  I cannot find the original blog post this came from, but you can see the inspiration piece here.


Stamps: Perfect Fit-Holidays
Inks: Cashmere
Papers: Ruby, Colonial White, Kraft cardstock
Accessories: Brown and Tan Sparkles
Tools: Art Philosophy Cricut cartridge


It's super windy here today...a perfect day to stay indoors and craft!
  From Millan.Net

Wednesday, November 6, 2013

Another Christmas Card Workshop Piece

I'd like to show you card #5 for my upcoming workshop.  This is another Pinterest inspired card, take a look at the inspiration piece here.

And now my version:


Stamps: Ornamental Cheer
Inks: Cashmere
Papers: Roxy (retired), Kraft, Colonial White, Ruby cardstock
Accessories: Almond Glitz Gel, Brown and Tan Sparkles
Tools: Artbooking Cricut cartridge, Art Philosophy Cricut cartridge, micro-tip scissors


I've had a lot of fun recreating Pinterest finds...quite a challenge!


Monday, November 4, 2013

Happy Holidays

My family went camping this weekend...something I've not done in many, many years. 
From Millan.Net

It was with the purpose of Loquacious earning a scout badge, which he did, but it also reminded me of the many reasons I haven't camped in a long time.  The lack of sleep, thanks to a overly warm tent (5 bodies put out a lot of heat!) and a not very thick sleeping pad had me so tired...I really did not know what day it was when I woke up yesterday.  Good thing it was Sunday!   And thank goodness for Sunday naps...though mine wasn't very long.

Anyway, now it's Monday and a brand new week!  Also a brand new month!  Pretty soon the holiday rush will be here and over before you know it.

Today I'm going to share card #4 of my upcoming workshop.  You can see the inspiration card here.

And here is my version:


Stamps: Merry and Bright
Inks: Ruby, Cashmere
Papers: Colonial White, Kraft cardstock
Accessories: Ruby Mini-Medley Assortment, Brown and Tan Sparkles, Color Ready Seam Binding, Almond Glitz Gel
Tools: Artiste Cricut cartridge


Now, before I get to play in my Closet today, I'll have to do a little housework.
From Millan.Net

Nothing like cleaning up after a camping trip!

Wednesday, October 30, 2013

Wishing You a Very Happy Holiday

And by that I don't mean Halloween...which is tomorrow...feel free to go into panic mode if you're not quite ready for that yet! From Millan.Net


No, I'm talking about card #3 for my Pinterest Inspired Christmas card workshop.  I think this is my favorite of the bunch!  You can see the original inspiration here, and my version of it here:

Stamps: Universal Backgrounds, Holiday Cheer
Inks: Cashmere, Ruby
Papers: Ruby, Colonial White, Kraft cardstock
Accessories: Almond Glitz Gel, Brown and Tan Sparkles
Tools: Art Philosophy Cricut cartridge

I don't know what we'd do if we actually got this much snow.
From Millan.Net

But it gives me a peaceful feeling all the same.

Happy Wednesday!

Thursday, October 24, 2013

Merry & Bright

From Millan.Net  Good morning!  Chilly mornings means free A/C around here...though my boys all think it's too cold to have the doors open so early.
But that also means hot cocoa if they're up early enough. From Millan.Net

In my last post I shared one of the cards for my upcoming Pinterest inspired workshop.  This is another one we'll be making that day.  The original can be seen here.

Stamps: Merry and Bright
Inks: Ruby, Cashmere
Papers: Roxy Reflections Kit (retired), Ruby, Kraft, Colonial White cardstock
Accessories: Brown and Tan Sparkles, Almond Glitz Gel
Tools: Art Philosophy Cricut cartridge
 

My workshop is scheduled for Saturday, November 9 at my home from 12pm-4pm.  The cost is $20 and we'll be making 12 cards, 2 of each 6 designs.  If you're not local but would still like a kit, just send me an email and I'll get one set up for you!


Saturday, October 19, 2013

It's The Most Wonderful Time Of The Year...Christmas Card Making Time!

I know, Halloween is still over a week away.  From Millan.Net

But I have succumbed to the crafters need to get Christmas cards started!  (Because if I start them now, maybe I'll actually have some done to send on time!)

I've been busy creating cards from some really great Pinterest inspirations.  And I think that's half the fun of Pinterest...seeing something and trying to recreate it with what you have!  Here is the original, found at Stamped Silly.

I love the large snowflake...even though we rarely see it here in Tucson.
Here is my version:

Stamps:  Merry and Bright
Inks: Cashmere, Ruby
Papers: Kraft, Ruby, Colonial White
Accessories: Almond Glitz, Brown and Tan Sparkles
Tools: Art Philosophy and Artiste Cricut Cartridges

I've made a set of coordinating cards for this year.  I love the look of Kraft with the Ruby and Colonial White cardstocks!  I'll be back soon with more cards to share from the set.

Thursday, October 25, 2012

Heart 2 Heart Challenge: Christmas

Well it seems as if I'm doing the October Heart 2 Heart Challenges backwards!  It just so happens I've had some pieces waiting to share and the challenges are lining up perfectly with them.

So last week's challenge was to share a Christmas creation.  I made these gift boxes to show at our Open House in August and now I can share with you!  (Believe me, it is hard to get into the Christmas spirit of creating during August in Tucson!)
Smiley from millan.net

Inks: Cashmere
Papers: Pear & Partridge Reflections Kit
Accessories: Dimensional Elements In Color-Holiday

These cute little trees boxes are cut from the Pie Box on page 70 of the Artiste cartridge.  I used the Pear & Partridge papers and cut them at 6", 4.25", 3", and 2.25".  A little sponging with Cashmere ink, decorate with the Holiday DE and you're good to go! Smiley from millan.net

If you choose to use them as decorations instead of treat boxes, they nestle very nicely inside one another for storage!


Sunday, October 7, 2012

Poinsettia Christmas Cheer

I love Pinterest.  Really...but as I was telling a friend this weekend, it is such a blessing and a curse!
It is so full of ideas and information, I would totally be lost if it went away.  And my family would starve, too!  Just kidding, they don't get to eat anyway, I'm always on Pinterest!!!

Anyway, I saw this card by KittieKraft and knew I'd have to copy it.

And I know it is only October, but I have Christmas cards on the brain!
Especially since I have this month's SOTM on my desk...staring at me...calling out to me.Smiley from millan.net

So one more card for now, then maybe I can get some Halloween things made.

This card was another quick and easy one to put together.  All the cuts were made with the Artiste cartridge. 

Stamps: Very Merry Christmas October 2012 SOTM
Inks: Ponderosa Pine, Ruby, Creme Brulee marker
Papers: White Daisy, Ponderosa Pine, Ruby cardstock
Accessories: Pearl Opaques, Gold organdy ribbon
Tools: Artiste Cricut cartridge, Rub-On Tool, Spray Pen


Did you know you can make a poinsettia with a star?Smiley from millan.net 

Pretty neat, right?  Here is how I put it together:

I used the star on pg. 80 of the handbook, cut in various sizes: two at 3.25" in Ponderosa Pine, and one of each at 3", 2.75", 2.5", and 2.25" in Ruby.  Flowers are not flat, so I placed them on my VersaMat and used my Rub-On Tool to gently roll around the center of each leaf/petal piece.  It curled it up nicely.  I layered it, rotating each piece as I went.  Then gave the whole thing a couple of squirts of water with my Spray Pen.  I rolled the layers up a little more and centered it in my frame.

The frame is found on pg. 60.  I cut it at 5.25" and again at 4.75" out of White Daisy and layered them.  After all the pieces were in place, I colored some Pearl Opaques with my Creme Brulee alcohol marker and placed them in the middle of the petals.  I cut some strips of ribbon, made some loops and placed them under the leaves.  Then I stamped the sentiment from the Very Merry Christmas stamp set in Ruby ink.  That was it!

This is a big card, 6" x 6" and very dimensional so I won't be mailing it!  But it will fit nicely in boxes that are being shipped for the holidays.

Oh!  That reminds me, I have to start my Christmas shopping soon!  Smiley from millan.net

How about you??


Thursday, October 4, 2012

A Very Merry Christmas Card

I'm so pleased that so many of you liked my ornament I posted the other day!  It warms my heart.
  Smiley from millan.net
Thank you!

Today I'm going to share another card I've made with the Very Merry Christmas SOTM set.  This time I was going for more of a rustic Christmas look.

Stamps: Very Merry Christmas October 2012 SOTM
Inks: Desert Sand, New England Ivy, Ruby
Papers: Colonial White, Ruby, Kraft cardstock
Accessories: Create a Shade Pearl Paint
Tools: Paper Piercer, Square punch, Spray Pen


This was an easy and quick card to put together.  I mixed up some Create a Shade Pearl paint and water in the Spray Pen to give the Kraft cardstock a bit of shimmer.  Then I paper pieced the tree and gifts.  The banner was made with a strip of cardstock and I used the square punch to notch out the end.  And that was it!  May have to use this as some of my cards this year.
It's about that time to get started! Smiley from millan.net


Want to make your own card?  Get all your supplies over at my website!  And be sure to JOIN the October Craft Closet Spooktacular when you place your order...your name will be put into a drawing for $25 in select CTMH product when you do!


Tuesday, October 2, 2012

Very Merry Christmas Ornament Tutorial: Part 2

Alright, who's ready to finish off their ornament from Part 1Smiley from millan.netThen let's get started!


This is what we've finished so far.
Just set this aside for now and we'll create the center embellishments.


1.  Take the two 12" strips of cardstock and begin accordian folding them both.


2.  You should end up with nice, tight accordians.


3.  Take your favorite adhesive and attach one end of the White Daisy strip to the other,
overlapping the edges, to create a ring.


4.  Gather one edge of the ring towards the center and push down, creating a rosette.
Take the 2" White Daisy circle and cover it with Liquid Glass.
Attach this to the center of the rosette.
(It doesn't have to be exactly centered.  This just makes a base for the rosette to attach to.)


5.  Use a block or some other object to set on top of the rosette as it dries.


6.  When it has dried, use the Silver Glitz Glitter Gel to edge the rosette.  Let it dry.


7.  Take the Twilight strip and repeat steps 3 & 4, except instead of attaching it to a circle base,
place Liquid Glass on the White Daisy rosette and place the Twilight rosette on top, fitting it in the folds, as shown in the photo.  Place theblock on top and let dry.


8.  Add more Silver Glitz to the edge of the Twilight rosette.


9. Did you know you can color embroidery floss with our alcohol markers?  Take a long string of floss, 7"-10" (whatever your fingers will be comfortable tying in a bow) and color with the Twilight marker.  Use the blending marker to smooth out the color if you wish.


10.  I forgot to take step by step photos of this next embellishment...sorry.
  • Stamp the "A Holiday Treat" image from the stamp set onto the Shift/Accent 4 White Daisy cut out.
  • Edge the 1" White Daisy circle with Silver Glitz.  Attach to stamped image with 3-D foam tape.
  • Add Sparkles to the stamped image as shown.
  • Thread the Twilight floss through a large Bling button and attach to the circle with a Glue Dot.


11.  Now you should have all 3 main pieces as shown.


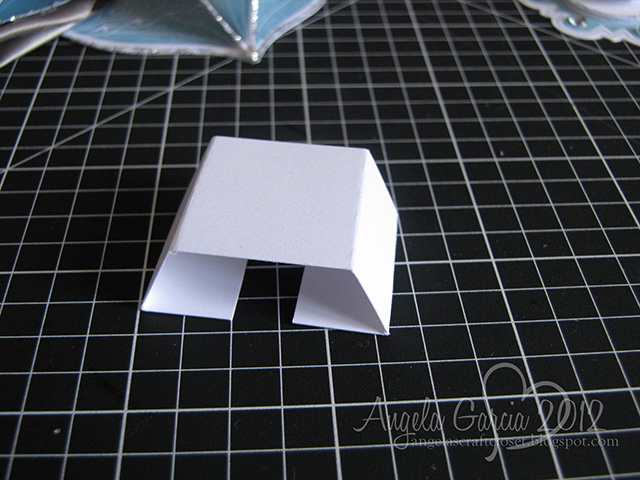
12.  Take the 1" x 3" White Daisy piece and fold along the score lines.


13.  This creates a base for the rosette to attach to.


14.  Use Liquid Glass to attach it to the center of the ornament base.


15.  Use Liquid Glass to attach the rosette to the ornament base.


16. Use Liquid Glass to attach the center embellishment to the rosette.
Now your ornament is complete!


17.  For the hanger, take the 16" ribbon piece and, using Glue Dots, fold over the ends as shown.


18.  Flip the ornament over.  Note where the top of it is before you attach the ribbon.


19.  Attach the ends of the ribbon with Glue Dots.


20.  Cover the back with Liquid Glass and the remaining 3" circle.


21. Flip it right side up again.  Make sure your ribbon is nice and flat.


22.  With White Daisy embroidery floss, thread a small Bling Button and tie around the ribbon hanger, just above the ornament.
 
There!  You're finished! Smiley from millan.net


Engineer had a good idea.  He wanted me to make two and attach them back to back.  And I may do this, just for fun...but after I've had a nap!
Smiley from millan.net

If you create one of these for yourself, please let me know! I'd love to see it!


Shareaholic

Related Posts Plugin for WordPress, Blogger...