
 Then let's get started!
This is what we've finished so far.
Just set this aside for now and we'll create the center embellishments.

1. Take the two 12" strips of cardstock and begin accordian folding them both.

2. You should end up with nice, tight accordians.

3. Take your favorite adhesive and attach one end of the White Daisy strip to the other,
overlapping the edges, to create a ring.

4. Gather one edge of the ring towards the center and push down, creating a rosette.
Take the 2" White Daisy circle and cover it with Liquid Glass.
Attach this to the center of the rosette.
(It doesn't have to be exactly centered. This just makes a base for the rosette to attach to.)

5. Use a block or some other object to set on top of the rosette as it dries.

6. When it has dried, use the Silver Glitz Glitter Gel to edge the rosette. Let it dry.

7. Take the Twilight strip and repeat steps 3 & 4, except instead of attaching it to a circle base,
place Liquid Glass on the White Daisy rosette and place the Twilight rosette on top, fitting it in the folds, as shown in the photo. Place theblock on top and let dry.
place Liquid Glass on the White Daisy rosette and place the Twilight rosette on top, fitting it in the folds, as shown in the photo. Place theblock on top and let dry.

8. Add more Silver Glitz to the edge of the Twilight rosette.

9. Did you know you can color embroidery floss with our alcohol markers? Take a long string of floss, 7"-10" (whatever your fingers will be comfortable tying in a bow) and color with the Twilight marker. Use the blending marker to smooth out the color if you wish.

10. I forgot to take step by step photos of this next embellishment...sorry.
- Stamp the "A Holiday Treat" image from the stamp set onto the Shift/Accent 4 White Daisy cut out.
- Edge the 1" White Daisy circle with Silver Glitz. Attach to stamped image with 3-D foam tape.
- Add Sparkles to the stamped image as shown.
- Thread the Twilight floss through a large Bling button and attach to the circle with a Glue Dot.

11. Now you should have all 3 main pieces as shown.

12. Take the 1" x 3" White Daisy piece and fold along the score lines.
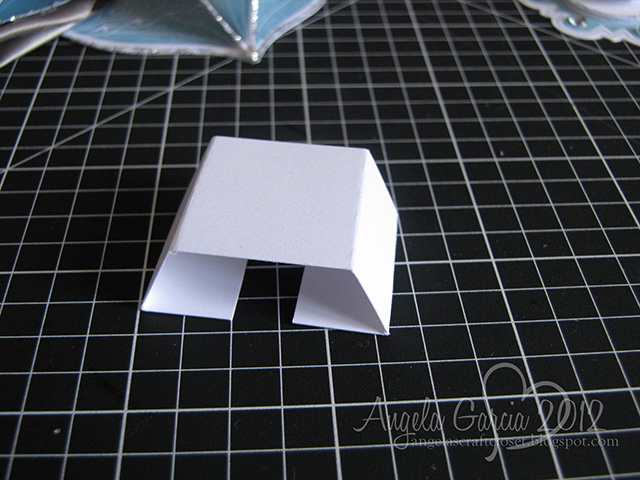
13. This creates a base for the rosette to attach to.

14. Use Liquid Glass to attach it to the center of the ornament base.

15. Use Liquid Glass to attach the rosette to the ornament base.

16. Use Liquid Glass to attach the center embellishment to the rosette.
Now your ornament is complete!

17. For the hanger, take the 16" ribbon piece and, using Glue Dots, fold over the ends as shown.

18. Flip the ornament over. Note where the top of it is before you attach the ribbon.

19. Attach the ends of the ribbon with Glue Dots.

20. Cover the back with Liquid Glass and the remaining 3" circle.

21. Flip it right side up again. Make sure your ribbon is nice and flat.

22. With White Daisy embroidery floss, thread a small Bling Button and tie around the ribbon hanger, just above the ornament.
There! You're finished! 

Engineer had a good idea. He wanted me to make two and attach them back to back. And I may do this, just for fun...but after I've had a nap!

If you create one of these for yourself, please let me know! I'd love to see it!

Thank you for this detailed tutorial. It's a beautiful ornament!
ReplyDeleteOh my word..this is just stunning! Thank you so much for taking the time to do such a detailed tutorial! I hope to make one this weekend...I'm thinking PINK! :)
ReplyDeleteThanks so much for the easy to follow instructions! I looked up the other catalogue and you took it up a notch. Just gorgeous!
ReplyDeleteWow, thank you Angela for this fabulous tutorial!!! You have inspired me to make them!!!
ReplyDeletethank you just found your blog great tutorial.
ReplyDelete